I’ve been spending the last days on Stack Overflow answering posts. Many of them being related to, what I consider, basic notions of a plugin. After helping someone on his first plugin, I thought I should share this with the world because there is nowhere on MSDN I can find this stuff.
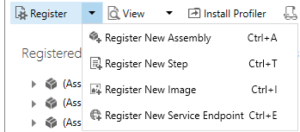
Notion 1: Plugin Registration Tool
The plugin registration tool is THE tool you need to develop plugins. I use it everyday, it’s great and it’s very visual.
Here’s a link to the latest version. Be sure to take the right version for your CRM.
Notion 2: Assembly
An assembly is your plugin library compiled. It can also be a workflow library.
When you register, you should choose Sandbox and Database. Unless, one plugin connects to an external web service or the web. Then, separate this plugin in another assembly. I personally name my libraries Xrm.Plugin.Sandbox, Xrm.Workflow.Sandbox, Xrm.Plugin and Xrm.Workflow, to make sure people know what isolation mode it is. I don’t recommend other assembly location (Disk, GAC). They are old school and prone to errors.
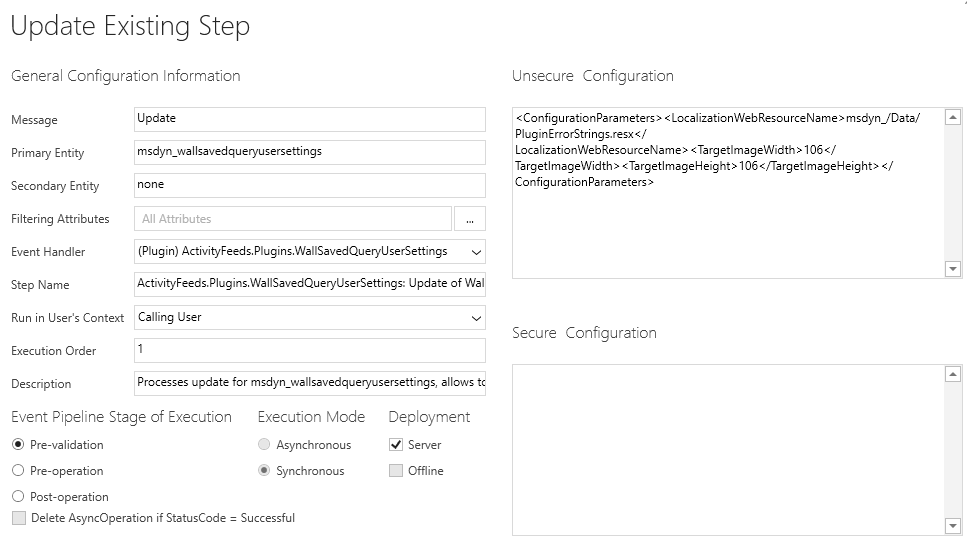
Notion 3: Step
- Secondary Entity, never used it in seven years
- Run in User’s Context, choose either an administrator user account or calling user. This will influence the privilege of the plugin. Ex: an admin could write in a secret entity and the calling user could not.
- Execution Order, you can choose to have two steps from different plugins executing in a specific order. After sometimes I realized making two steps on the same event for the same entity was only complexifying everything. Now, I regroup everything in the same plugin.
- Pre-validation is executing the plugin outside of an SQL transaction before updating the database. I use it for 1% of my plugin. You should go for Pre-operation most of the time.
- Pre-operation and post-operation are executing inside an SQL transaction. Meaning it will rollback if there’s an error.
- Don’t use both unsecure and secure configuration. There are not designed to be deployed. I prefer to create an entity called Parameter. It’s a bit less performant but easier to manage.
- Filtering Attributes, will control the trigger of your plugin. Especially on updates. You don’t want to trigger a plugin every time when you update an account.
Notion 4: Target
- The target is essentially all the data you sent to the server to be saved.
Ex A: You create an Account. Target will contain Name, Primary contact, address, currency, and everything displayed on the form
Ex B: You update the name of the Account. Target will contain Name, Account Id.
- Name your target clearly so it becomes a standard.
var target = (Entity)context.InputParameters[“Target”];
- If you modify the target in a plugin on pre-operation, the data will be sent to the server after. So, no need to save another time. If you modify the target on post-operation, then the data was sent to the server, you are forced to save again. It could trigger the same plugin, so think in advance.
- You can find the entity id only on post-operation on create.
Notion 5: Image
- The image is the previous state of the entity you update. Choose only the fields you need to improve performance
Ex C: You update the name of the Account but you need to save the old name in another field.
var pre = (Entity)context.PreEntityImages[“pre”];
- I name my pre image: “pre” for consistency
- You only need one pre image per step
- You also have the option to do a post image. I use it 0% of the time.
Notion 6: Merge
Merge is a notion that can improve the way you code.
Ex D: Let’s say you have a plugin that can trigger on the modification of 3 fields A, B or C. The plugin is making a complex calculation with those values. It’s important for your business, so it needs to be right every time.
You don’t know what the user will do. He can modify one or three values per save. So you need to cover all the possibilities.
In the image, you will always find the previous values. But you also need to check the target. You end up with this:
var target = (Entity)context.InputParameters["Target"];
var pre = (Entity)context.PreEntityImages["pre"];

var a = pre.Attributes["new_a"];
var b = pre.Attributes["new_b"];
var c = pre.Attributes["new_c"];

if(target.Attributes.Contains("new_a"))
{
    a = target.Attributes["new_a"];
}

if(target.Attributes.Contains("new_b"))
{
    b = target.Attributes["new_b"];
}

if(target.Attributes.Contains("new_c"))
{
    c = target.Attributes["new_c"];
}

// do the calculation
// update your entity
This is a common example. Now imagine you do the same with 20 values. It makes the code bloated and you risk making a mistake. Let’s use a merge:
internal Entity Merge(Entity target, Entity preImage)
{
    if (preImage == null)
        return target;
    else if (target == null)
        return PreImage;

    Entity resultat = preImage;

    foreach (var a in target.Attributes)
    {
        if (resultat.Attributes.Contains(a.Key))
        {
            resultat.Attributes[a.Key] = a.Value;
        }
        else
        {
            resultat.Attributes.Add(a.Key, a.Value);
        }
    }

    return resultat;
}
var target = (Entity)context.InputParameters["Target"];
var pre = (Entity)context.PreEntityImages["pre"];
Entity merge = Merge(target,pre);

// do the calculation with merge
// update your entity
Since we know that the pre is containing all the values and the target some newest values, we use the pre as baseline. Then, we overwrite the pre values with the new target values.
This is it for now. I will update this post with more information in the future.
Hello Nick!! Thank you so much for these articles, they really are the best!!!
I have another question however, which involves the associate message for plugins.
Please refer to the question here:
https://stackoverflow.com/questions/51617104/whats-in-the-target-for-an-associate-message
Thank you so much in advance. I have recommended your blog to all my CRM buddies!!